Boho or Crown Braided Red Carpet Style
Hi everyone,
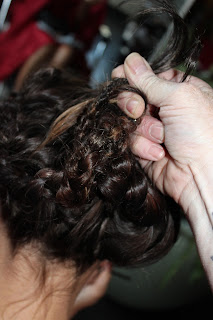
I have a relatively easy braided style that I did in the salon today, that I am going to show you. Here is a step by step photo essay of how I was able to achieve the look. I will outline the step by step in written word as well, except 4-8 where I am braiding because I need two hands to braid. I added in some hair wefts for a little more thickness to the braid because of the fine haired client. Here we go.
1. Comb through the hair and if needed add a volumizing spray or something to add a bit of grip to the hair. I then blow dry that in the hair before continuing.
3. I am adding in some extra hair so I hand blend some right there to match it up to the natural hair of the client before proceeding.
4. Section the hair into 2 parts. I used the natural part in front and made my way down the back of the head, somewhat in the center. It doesn't matter how perfect it is, just roughly down the middle.
5. Separate the 2 sides from each other and secure the side that you will be doing second with a rubber band or grips.
6. Starting in the front of the head, section a small part of hair following the part and separate into 3 parts. For a french braid you will cross over the top of each section and for a Dutch you will cross under each section as you cris cross.
7. When you have reached the back of the section and are no longer able to keep the braiding at the scalp, carry on with a normal 3 strand braid until you reach the end and secure it with a rubber band.
8. The side that you pinned off earlier, you are now going to do the same thing that you did with the first side. Secure the ends with a rubber band .
9. Simply tie these into a knot, once, twice or three times depending on hair length.
10. Tuck in your loose ends and secure them with bobby pins.
11. Loosen up the braided area next to the scalp to make a bohemian look and casual feel to the style depending on your liking.
12. Add some spray if you need to. Pull out some by the face if you need to add softness or just want to. I don't always do that. I do let pieces just loosen naturally if the look good. If not , simply tuck them and secure them with a bobby pin or two.
13. I always say to shake your head from side to side to see if there is a loose or not so secure spot. If you feel like there is , add in your final pinning and you are done.
The Finished Look
and off the go to the symphony.
Here is a couple of celebrity styles that are similar in style to the one that I just did on Bronwyn. Now that you have learned how to do this braid, try it out. It won't hurt and you can always just take it down and try again if you mess up. Remember, it is supposed to be casual and so have some fun with it.
Your beauty expert guide
Mark Steven Lewis
Owner
Sanctuary Hair Salon
~ A Safe Haven For Natural Beauty ~
As seen in Glamour Magazine who is making Scarlett Johansson’s hairstyle their style guide for summer. The blonde bombshell looks gorgeous on the red carpet with a flawless halo braid, hot red lips and feline eyeliner flicks.

___________________________________________________________________


No comments:
Post a Comment